
MSU EBS system powers the digital experience of more than 50,000 students from all 50 states and 133 countries at Michigan State University. The university stands among just 53 schools worldwide as an “international powerhouse” due to its exceptional research output. New employees at this prestigious institution need to quickly learn this vital platform to manage their employment information.
The MSU EBS portal login might feel complex when you first use it. This complete guide helps new employees understand everything about the MSU EBS login portal in 2025, from setting up accounts to personalizing options. The system automatically logs users out after 30 minutes without activity, showing warning messages at the 25-minute mark. Users need to know these time limits and other portal features to use the system effectively.
Step 1: Logging In and Setting Up Your Account
You need proper authentication credentials and a good understanding of system timeouts to access the MSU EBS portal. New users should take specific steps to manage their accounts and log in successfully.
MSU EBS portal login instructions
The MSU EBS portal uses a multi-step authentication process:
- Enter your MSU email address and click “Next”
- Input your password and click “Sign In”
- Complete the Multi-Factor Authentication verification
Note that bookmarking the login page might trigger errors with the security system. The portal works best through official MSU links.
How to reset your password or NetID
You have several options to reset your MSU NetID password:
If you know your current password, visit https://auth.msu.edu and sign in. Click your name in the upper right corner, select Settings, find the “Change Password” box, and follow the prompts.
If you can’t remember your password, go to https://auth.msu.edu. Enter your MSU email address, select “Forgot password?”, and pick either phone or email verification. The MSU IT Service Desk can help with password resets at 517-432-6200.
Avoiding login errors like ‘User not assigned’
The “User is not assigned to this application” error shows that security systems aren’t syncing properly. You can fix this by submitting a ticket to the MSU IT Service Desk with your NetID and an error message screenshot.
New employees who see “No portal roles are assigned for this user” should check with their department about paperwork processing. The system automatically grants Employee Self-Service roles on your start date.
Session timeout and auto logoff explained
The EBS Portal lets you stay active for 30 minutes without any activity. Your Single Sign-On (SSO) session lasts 12 hours from your first login.
The system warns you after 25 minutes of inactivity. You can then extend your session for another 30 minutes or log off right away. You’ll need to log out of the Single Sign-On environment after clicking Log Off from the portal to exit EBS completely.
The quickest way to protect your account is to log out of each system after you finish instead of just closing your browser.
Step 2: Navigating the Portal and Applications
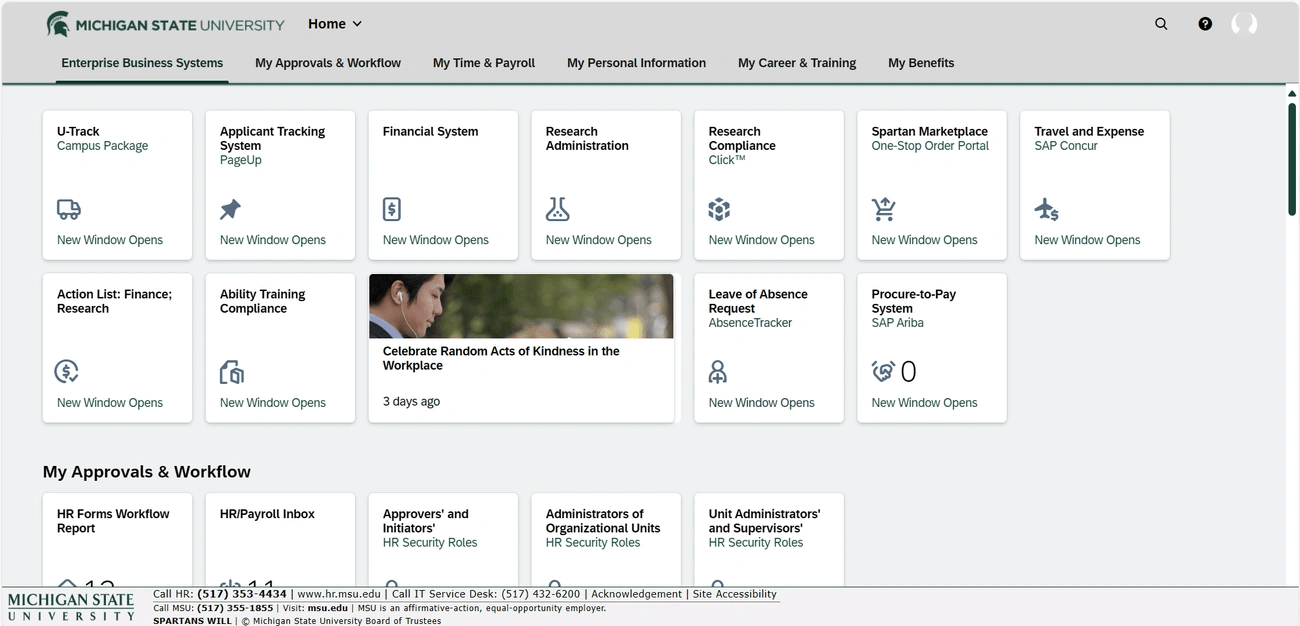
Image Source: MSU Human Resources – Michigan State University
The MSU EBS portal welcomes employees with a user-friendly interface that guides them through university systems. A good grasp of this layout helps save time and cuts down frustration while accessing essential employment details.
Understanding the portal landing page
Security roles determine the main navigation tabs you’ll see at the top of your MSU EBS portal screen. These tabs house various tiles that connect you to specific applications. Users with multiple tabs on smaller screens will spot a scroll icon when their mouse hovers near the right edge. A menu icon (down caret/arrow) drops down a complete list of your available tabs.
The portal groups related tiles under each tab by function. This interface, known as the “SAP Fiori Launchpad,” displays these tiles as clickable elements that lead to specific applications.
Using tiles to access HR and payroll tools
The MSU EBS system uses tiles as visual shortcuts to different applications. Here’s how you can check your payroll information:
- Select “My Time and Payroll”
- Click on the “Earning Statement” tile
- Click on either icon at the end of the row to view details
Visual cues make each tile more informative with unique icons, notification counts for pending items, and helpful notes like “New Window Opens”.
Tips for faster navigation and search
A search box sits at the top of the page to help you quickly find portal links. The search suggests relevant links as you type. Note that this search only finds portal links—not specific records, employees, or catalog items.
Your searches work best when you:
- Skip special characters, plus signs (+), or quotation marks
- Use basic keywords that match the function (like “personal” or “profile”)
- Double-check your spelling since the search needs exact matches
Keyboard shortcuts can speed up your navigation. The F4 key opens search dialogs and dropdown menus, while F6 lets you move around pages even without visible headings.
Step 3: Customizing and Using EBS Tools
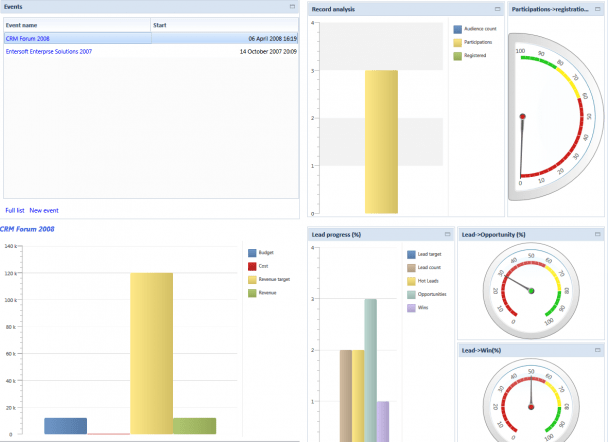
Image Source: Entersoft Wiki
MSU EBS users can make their work easier by customizing the portal. A good understanding of these options helps employees work efficiently in the system.
Personalizing frequently used applications
The MSU EBS portal lets you save your common report criteria as “variants” for quick access. Here’s how to create a variant:
- Enter your commonly used criteria
- Click “Save as Variant”
- Provide a descriptive name and description
- Select “Save”
Note that variants aren’t private, and other users can see them. Human Resources has created some pre-set variants in certain applications, such as the “/TOBEAPPROVED” variant for time entries.
Working with tables and multiple selections
You can sort tables by clicking column headers to arrange information in a logical order. A Multiple Select icon turns green once you make your selections.
Multiple selections give you these options:
- Select Single Values: List specific values
- Select Ranges: Choose value ranges
- Exclude values: Remove unwanted options
Downloading reports and printing documents
Data from most tables can be exported. The “Export to Spreadsheet” button saves your displayed columns. You can also split cells with multiple values and include filter settings in your export.
Each browser handles PDF printing differently. Microsoft Edge displays a toolbar with the print icon when you click the document. Some applications like Time Statements need you to right-click and select “Save as” before printing.
Accessibility features and screen reader support
JAWS and Microsoft Edge work best together for screen reader support. Users can turn on an accessibility flag after logging in. Screen reader navigation works best when you:
- Use “B” key to find buttons in JAWS
- Press “F4” to open search dialogs and dropdowns
- Use “F6” to move through pages without headings
Users with visual impairments can access high contrast themes through settings.
Step 4: Understanding Your Role and Access
Role-based permissions control every aspect of the MSU EBS portal. These permissions determine which tools employees can access and what actions they can perform.
Overview of EBS roles and permissions
The MSU EBS portal works through five distinct Unit Administrator roles connected to employee types:
- Unit Administrator – Support Staff
- Unit Administrator – Faculty/Academic Staff
- Unit Administrator – Graduate Assistants
- Unit Administrator – Students
- Unit Administrator – Temp/On-Call
Each role gives access to specific tiles and lets you modify records only for that employee type. The system assigns roles based on employment status. Employee Self-Service roles automatically become available on your first day.
How to request access to specific tools
You can request additional access by following these steps:
- Visit Access Management Services
- Select “EBS – Unit HR Roles” form
- Search for and select the employee requiring access
- Choose “Add” under the Action column
- Provide required department codes or MAU information
Access becomes available within several business days after approval. Related tiles show up the next day.
Special notes for new employees
New users might see a “Not Authorized” message if their hiring paperwork is incomplete. The system grants security roles only after your start date and hiring approval process. Your MSU NetID should match your personnel record’s NetID if problems continue past your start date.
Guidelines for unit administrators and time approvers
Time approvers must check and confirm employee timesheets each week. Timesheet entries should match information in EBS and Outlook calendars. Unit administrators need to review the HR/Payroll roles report to keep their department’s access levels appropriate.
Conclusion
The MSU EBS portal helps new Michigan State University employees work more efficiently. This digital hub lets you manage employment information, track time, access payroll, and handle many other key functions. New users can quickly learn the system by following four simple steps.
Security plays a vital role in the EBS experience. Users must manage their login details carefully and know about session timeouts and logout procedures. The accessible tab-and-tile interface becomes easy to use with practice. Search functions and keyboard shortcuts make navigation even faster.
You can customize the system to make daily tasks easier. The portal lets you create variants for common reports, sort table data, and export information as needed. It also includes features that make it accessible to users with different needs, creating an inclusive environment for everyone.
Your role determines what you can access and change in the system. New team members should know that they need completed hiring paperwork and processed employment status for full access. If you have access problems after your start date, your MSU NetID might need verification against personnel records.
The MSU EBS portal might look complicated at first. This guide gives you the knowledge to use the system with confidence. As you use it regularly and learn its features, this essential tool becomes valuable throughout your MSU career. Your success at the university depends on how well you use this digital foundation that supports thousands of students and staff members.
FAQs
1. How do I log in to the MSU EBS portal?
To log in, enter your MSU email address, click “Next,” input your password, click “Sign In,” and complete the Multi-Factor Authentication. Remember not to bookmark the login page to avoid security errors.
2. What should I do if I encounter a “User is not assigned to this application” error?
If you see this error, it indicates the security systems are out of sync. File a ticket with the MSU IT Service Desk, providing your NetID and a screenshot of the error message for resolution.
3. How can I customize my EBS portal for easier access to frequently used applications?
You can create “variants” to save commonly used report criteria. Enter your criteria, click “Save as Variant,” provide a name and description, then select “Save.” Keep in mind that variants are visible to other users.
4. What accessibility features does the MSU EBS portal offer?
The portal supports screen readers, with JAWS and Microsoft Edge being the preferred combination. You can activate an accessibility flag after login. High contrast themes are available through settings for visually impaired users.
5. How are roles and permissions assigned in the MSU EBS portal?
Roles are generally assigned based on employment status. Employee Self-Service roles are automatically granted on your start date. For additional access, you can submit a request through the Access Management Services, selecting the “EBS – Unit HR Roles” form.